3D Crochet Flower Granny Square Pattern
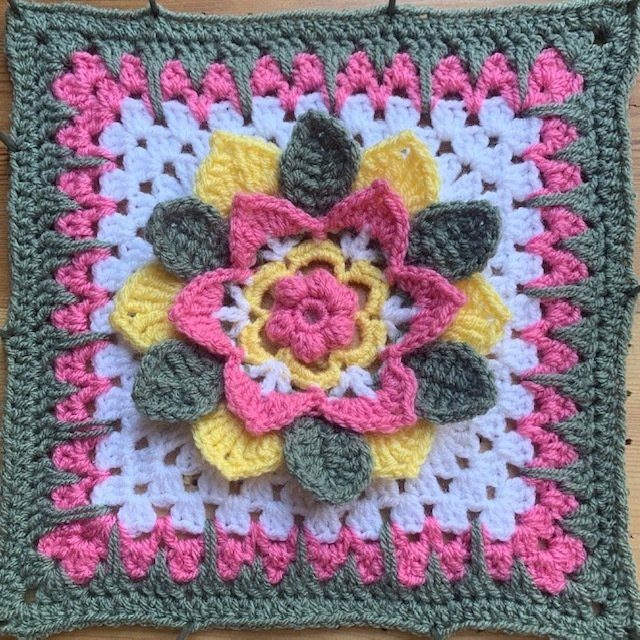
With Spring just around the corner, brighten up your crochet blankets and cushions with this free 3D flower granny square pattern which layers leaves and petals to create a stunning springtime crochet granny square. There is a detailed video tutorial along with lots of pictures to help you complete this crochet project.
Please note that some of the links in my blog are affiliate links. I may earn a small commission if you purchase via these links, but the price you pay is not affected
Free 3D Crochet Flower Granny Square Pattern
This isn’t my first foray into crochet flowers – I already have 2 different flower patterns:
This flower granny square is inspired by my Northamptonshire Rose pattern and I’ve been itching to create a 3D Flower granny square version since it’s release.
Bouquet of Flowers CAL
I’m a huge fan of pretty flowers and floral colours, and when I was asked to participate in the Bouquet of Flowers Afghan CAL, I knew exactly what I wanted to create for my afghan square.
During the event new crochet flower square will be available to download. You can see all the details of the event and the featured patterns by Clicking Here.
The Springtime Blooming Granny Square is featured in the event on Monday 28th March 2022 and on that day you will be able to download a copy of this pattern for free. Simply click the button below to grab the coupon code before navigating to my Ravelry shop to download using the 2nd button.
If you’d like to make all the squares, you can purchase all 20 of the squares right now for a low price and complete your blanket one square at a time. Click the button below to see purchase the bundle.
Purchase the Printable PDF Pattern
You can also grab a copy of the printable crochet pattern for the Blooming Springtime Granny Square, which include more detailed photos to help you complete your project in my pattern shops for just £3.50. Simply click the links below to be taken to your favourite pattern shops.
Due to the nature of working layered crochet patterns, this pattern is considered Intermediate (if not advanced), BUT as a good friend always says “as a beginner, everything feels hard”.
This pattern may be a bit of a challenge, but simply take your time over each row, ensuring you are starting at the right point and you’ll get this one done.
Can you even imagine how proud you’ll feel when you’ve got it done?
How to crochet 3D Flower Granny Square | Free Crochet Pattern
Skill Level: Intermediate
Materials:
- DK/Size 3 100% acrylic Yarn
- I used PaintBox Yarns Simply DK in the following 4 shades:
- A – 150 – Bubblegum Pink
- B – 121 – Daffodil Yellow
- C – 100 – Paper White
- D – 067 – Pine Green
Click here to purchase this yarn from LoveCrafts
- 4mm Crochet Hook
- Scissors
- 4 stitch markers
Abbreviations: US terms (UK in brackets)
St(s) Stitch(es)
Ch Chain
Ch Sp Chain Space
Sl St Slip Stitch
Sc (Dc) Single Crochet (Double crochet)
HDc (HTr) Half Double Crochet (Half Treble Crochet)
Dc (Tr) Double Crochet (Treble Crochet)
5Dc (5Tr) Bobble 5 double (Treble) crochet bobble stitch – see Special Stitches
Tr (DTr) Treble Crochet (Double Treble Crochet)
DTr (TTr) Double Treble Crochet (Triple Treble Crochet) – See Special Stitches
FP Work stitch around the front post
BP Work stitch around the back post
Spike Spike Stitch down to where indicated
PM Place marker
Gauge:
- is not essential. Check the length of the 1st row as instructed in pattern notes
Finished Size:
- 10″ by 10″ square
Pattern Notes:
- Whatever your skill level with crochet, I always recommend reading through this pattern before beginning. Get in touch if you need any help completing the pattern
- This square is worked in rounds
- Ch1 at the beginning of the round DOES NOT count as a stitch
- Ch2 at the beginning of the rows DOES NOT count as a stitch
- Ch3 at the beginning of a round DOES count as a stitch
Special Stitches
Treble Crochet (Tr) (UK- Double Treble Crochet – DTr)
- Wrap yarn around hook twice
- Insert Hook into stitch, yarn over, bring up loop
- (Yarn over, pull through 2 loops), 3 times
Double Treble Crochet (DTr) (UK – Triple Treble Crochet – TTr)
- Wrap yarn around hook 3 times
- Insert Hook into stitch, yarn over, bring up loop
- (Yarn over, pull through 2 loops), 4 times
5Dc Bobble (Bobble) (UK – 5Tr Bobble)
- Yarn over, insert hook into stitch
- Yarn over and bring up loop
- Yarn over, pull through 2 loops
- Repeat Steps 1-3, 4 more times (6 loops on hook)
- Yarn over, pull through all 6 loops
Springtime Blooming Granny Square | 3D Flower Granny Square Pattern Free
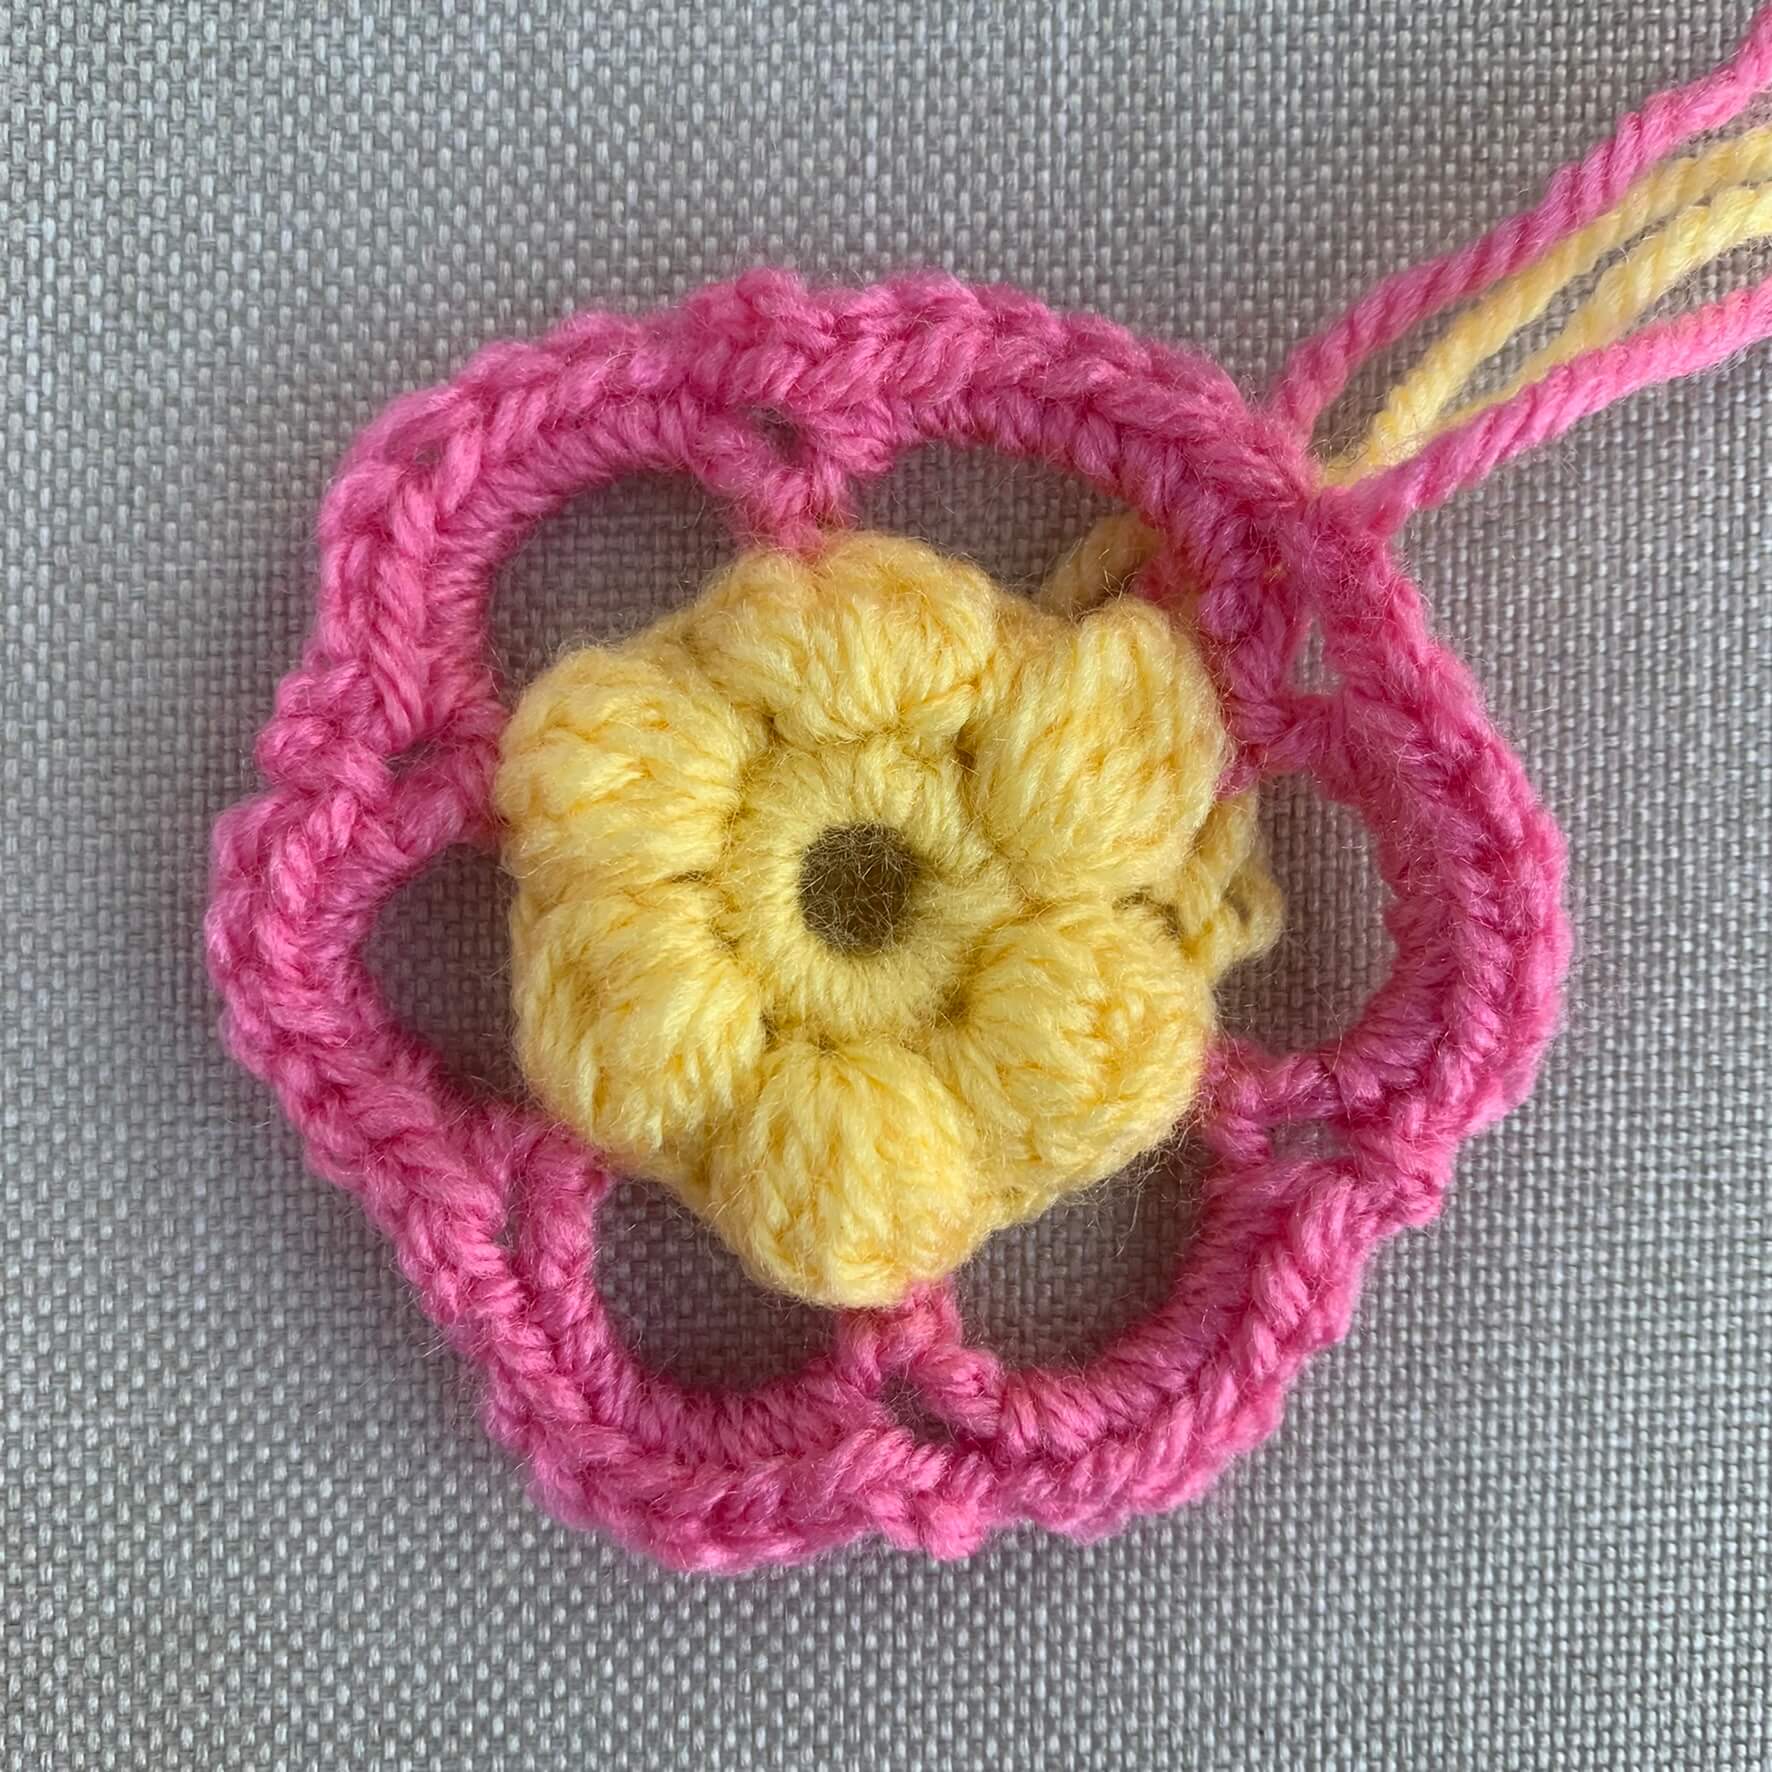
With A and 4mm hook
Ch4, Sl St to 1st ch to create ring.
Round 1: Ch1 (does not count as a st), 12 Sc into centre of ring. Sl St to 1st Sc to join round. (12)
Round 2: Ch2 (does not count as a st), *5Dc Bobble, HDc in next*. Repeat between * and * to end. Push Bobbles through to RS. Sl St to top of 1st Bobble to join round. Fasten off. (6 bobbles, 6 HDc)
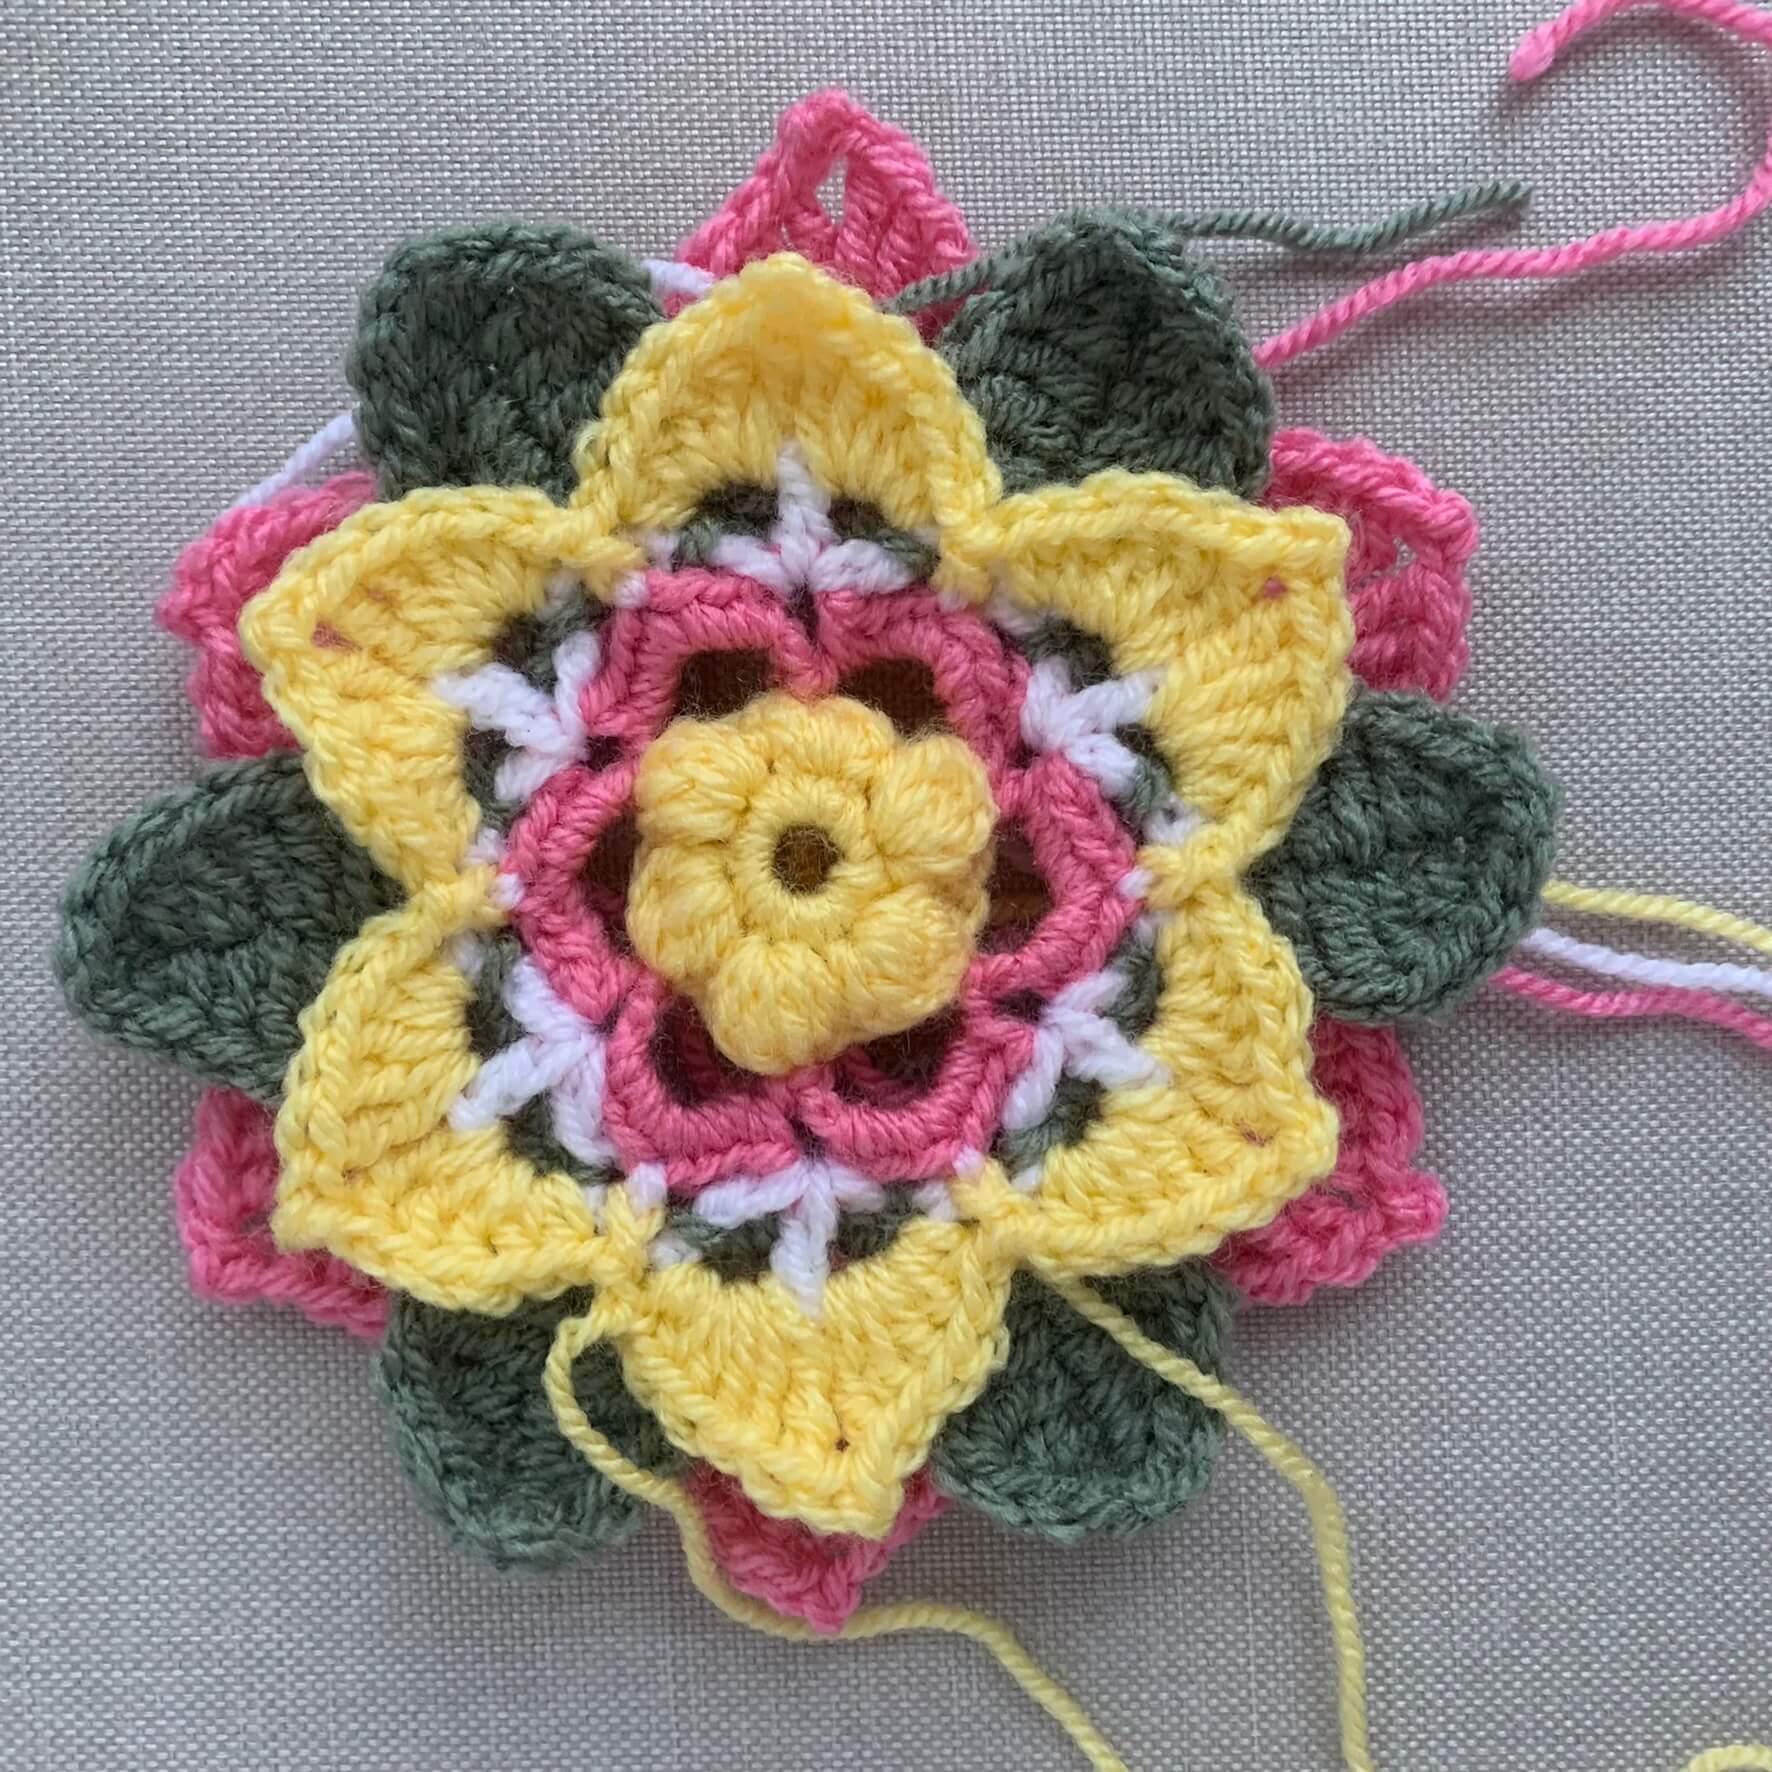
Round 3: Change to B: Join in the top of any Bobble, *ch6, sl st to top of next bobble*, repeat between * and * to end, joining last ch6 to top of 1st bobble worked. (6 ch sp)
Round 4: Sl St into ch sp, Ch1, *7Sc into ch sp, Ch2*, repeat between * and * to end, st to 1st Sc to join. Fasten off. (42 sc and 6 x ch2 spaces)
Round 5: Change to C: Join in any ch2 sp, Ch5 (counts as Dc & 2 ch), [Dc, ch2, Dc] in same ch2 sp as Ch5, *skip 3Sc, Sc in next, skip 3Sc, [Dc, ch2, Dc, ch2, Dc] in ch2 sp*, repeat between * and * to end, st to 1st Sc to join.
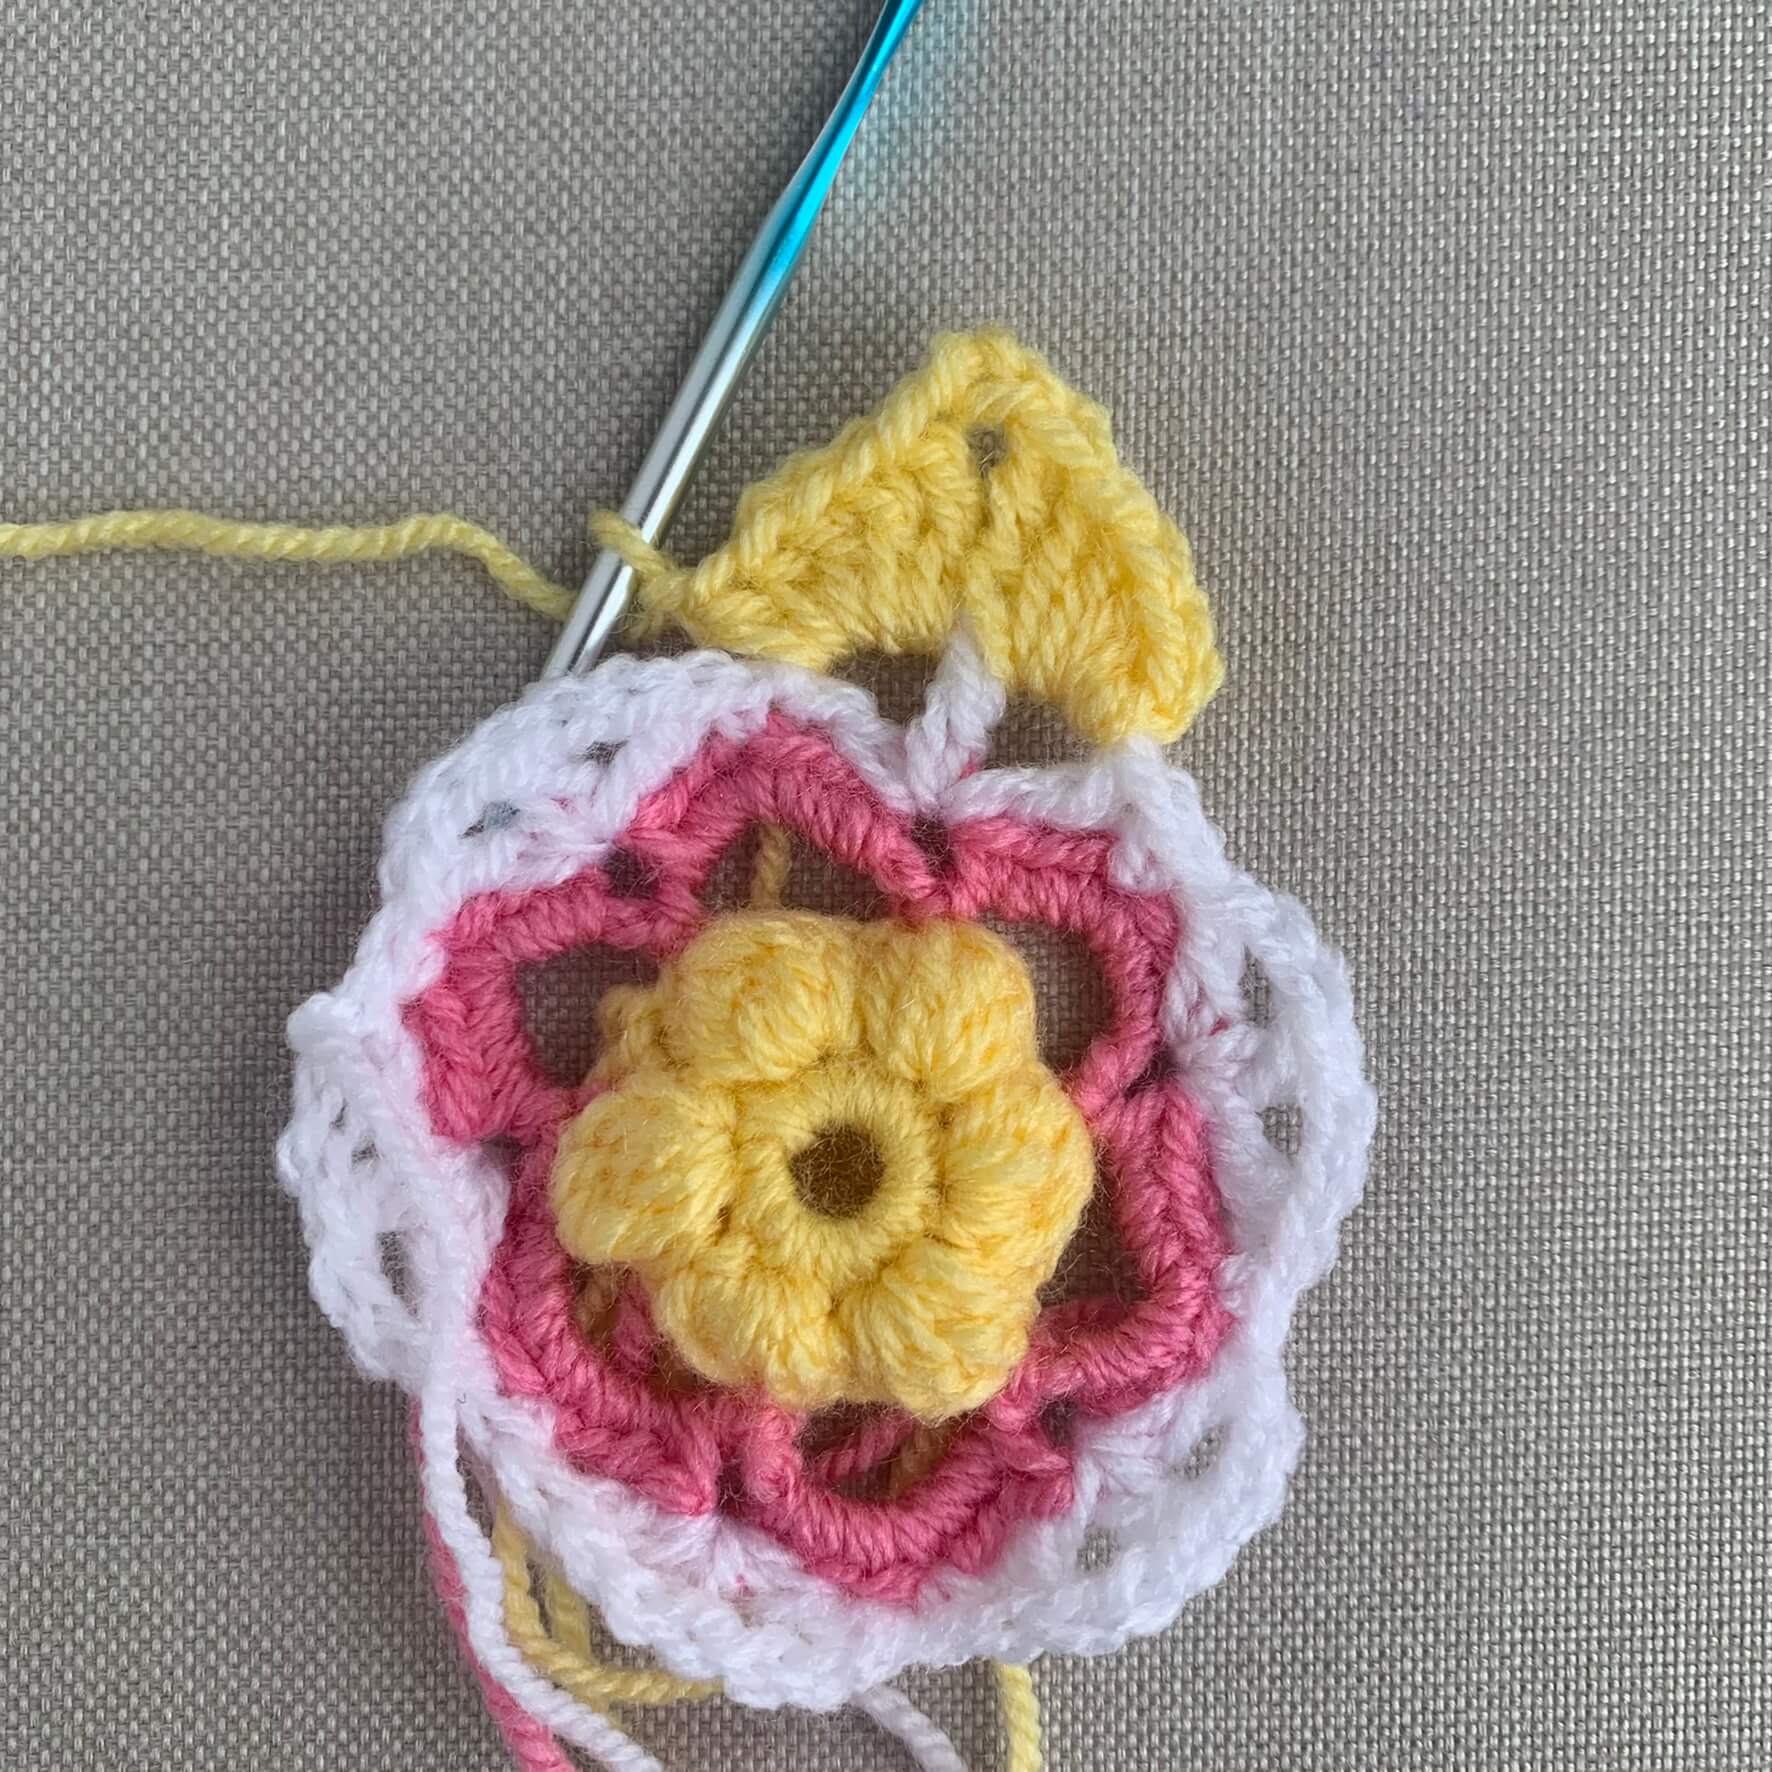
Round 6: Change to A: Join in right ch2 sp between Dc. Ch1, *[2HDc, 2Dc, Tr, ch2, sl st into 1st ch], [Tr, 2Dc, 2HDc], ch1, FP Sc around Sc from previous round, ch1*, repeat between * and * to end, sl st to 1st HDc to join. Fasten off. (60)
Round 7: Change to D: Join around BP any left post of ch2 sp from Round 5. *Ch9, sl st in 2nd ch from hook and next 7 ch, BP slst around right post of next ch2 sp, ch3, sl st around BP left post of next ch2 sp,* repeat between * and * to end. On last repeat, sl st to 1st ch instead of around post to join round. (6 x Ch9 lengths & 6 x ch3 spaces)
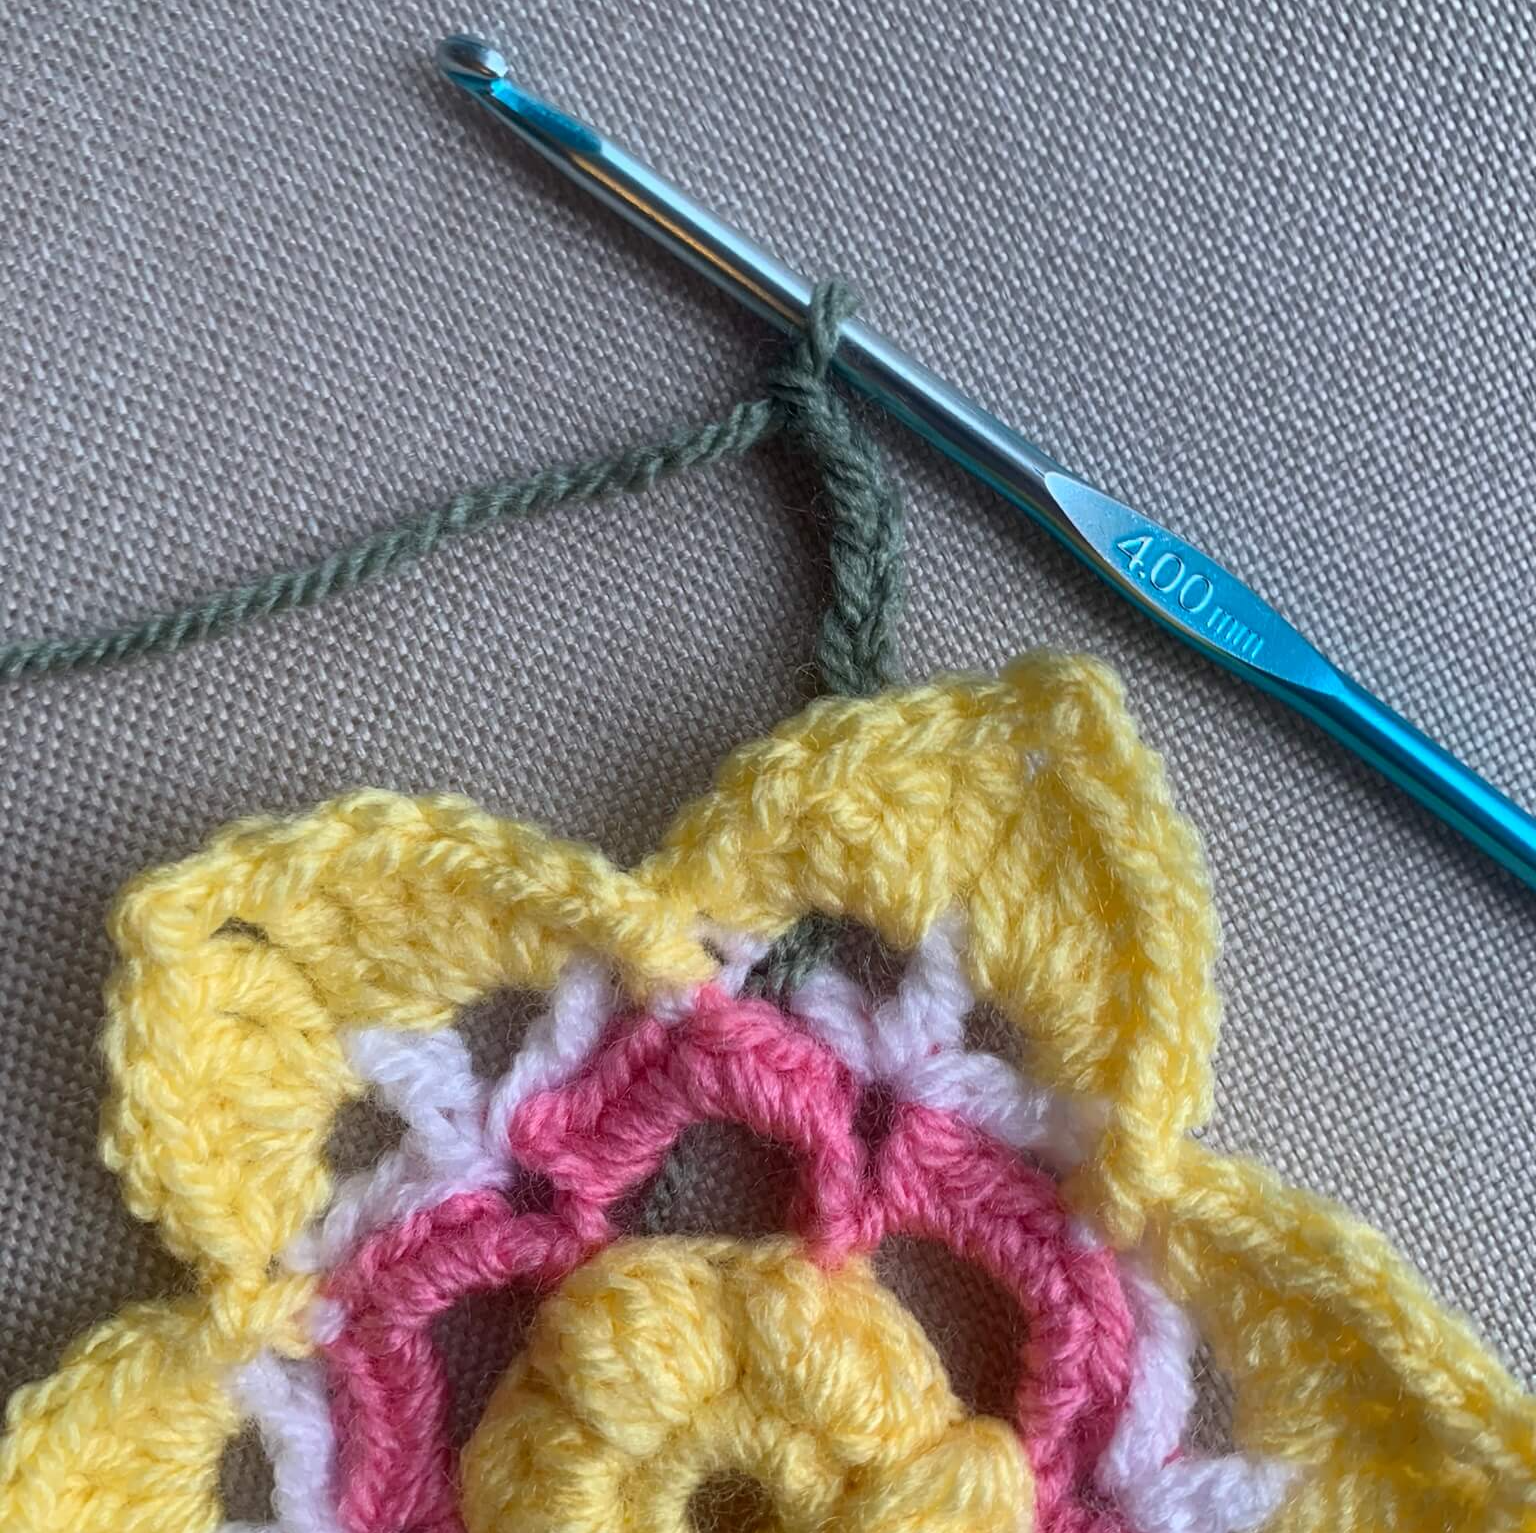
Round 8: Ch1, *Sc, HDc, Dc, Tr, Tr, Dc, HDc, [Sc, ch1, Sc] in end under loop of st, working back down over sl st’s, HDc, Dc, Tr ,Tr, Dc, HDc, Sc, 3Sc into ch3 sp of previous round*, repeat between * and * to end, sl st to 1st Sc to join round. Fasten off.
Round 9: Change to B: Join in 2nd Sc of 3Sc group between any leaf, Ch5 (counts as Dc & 2 ch), [Dc, ch2, Dc] in same st as Ch5, *Ch1, Sc into strand at base of leaf, Ch1, Skip 1 Sc, [Dc, ch2, Dc, ch2, Dc] in 2nd Sc of 3Sc group between leaf*, repeat between * and * to end, st to 3rd ch join. (12 ch2 spaces & 6 Sc) (see image below)
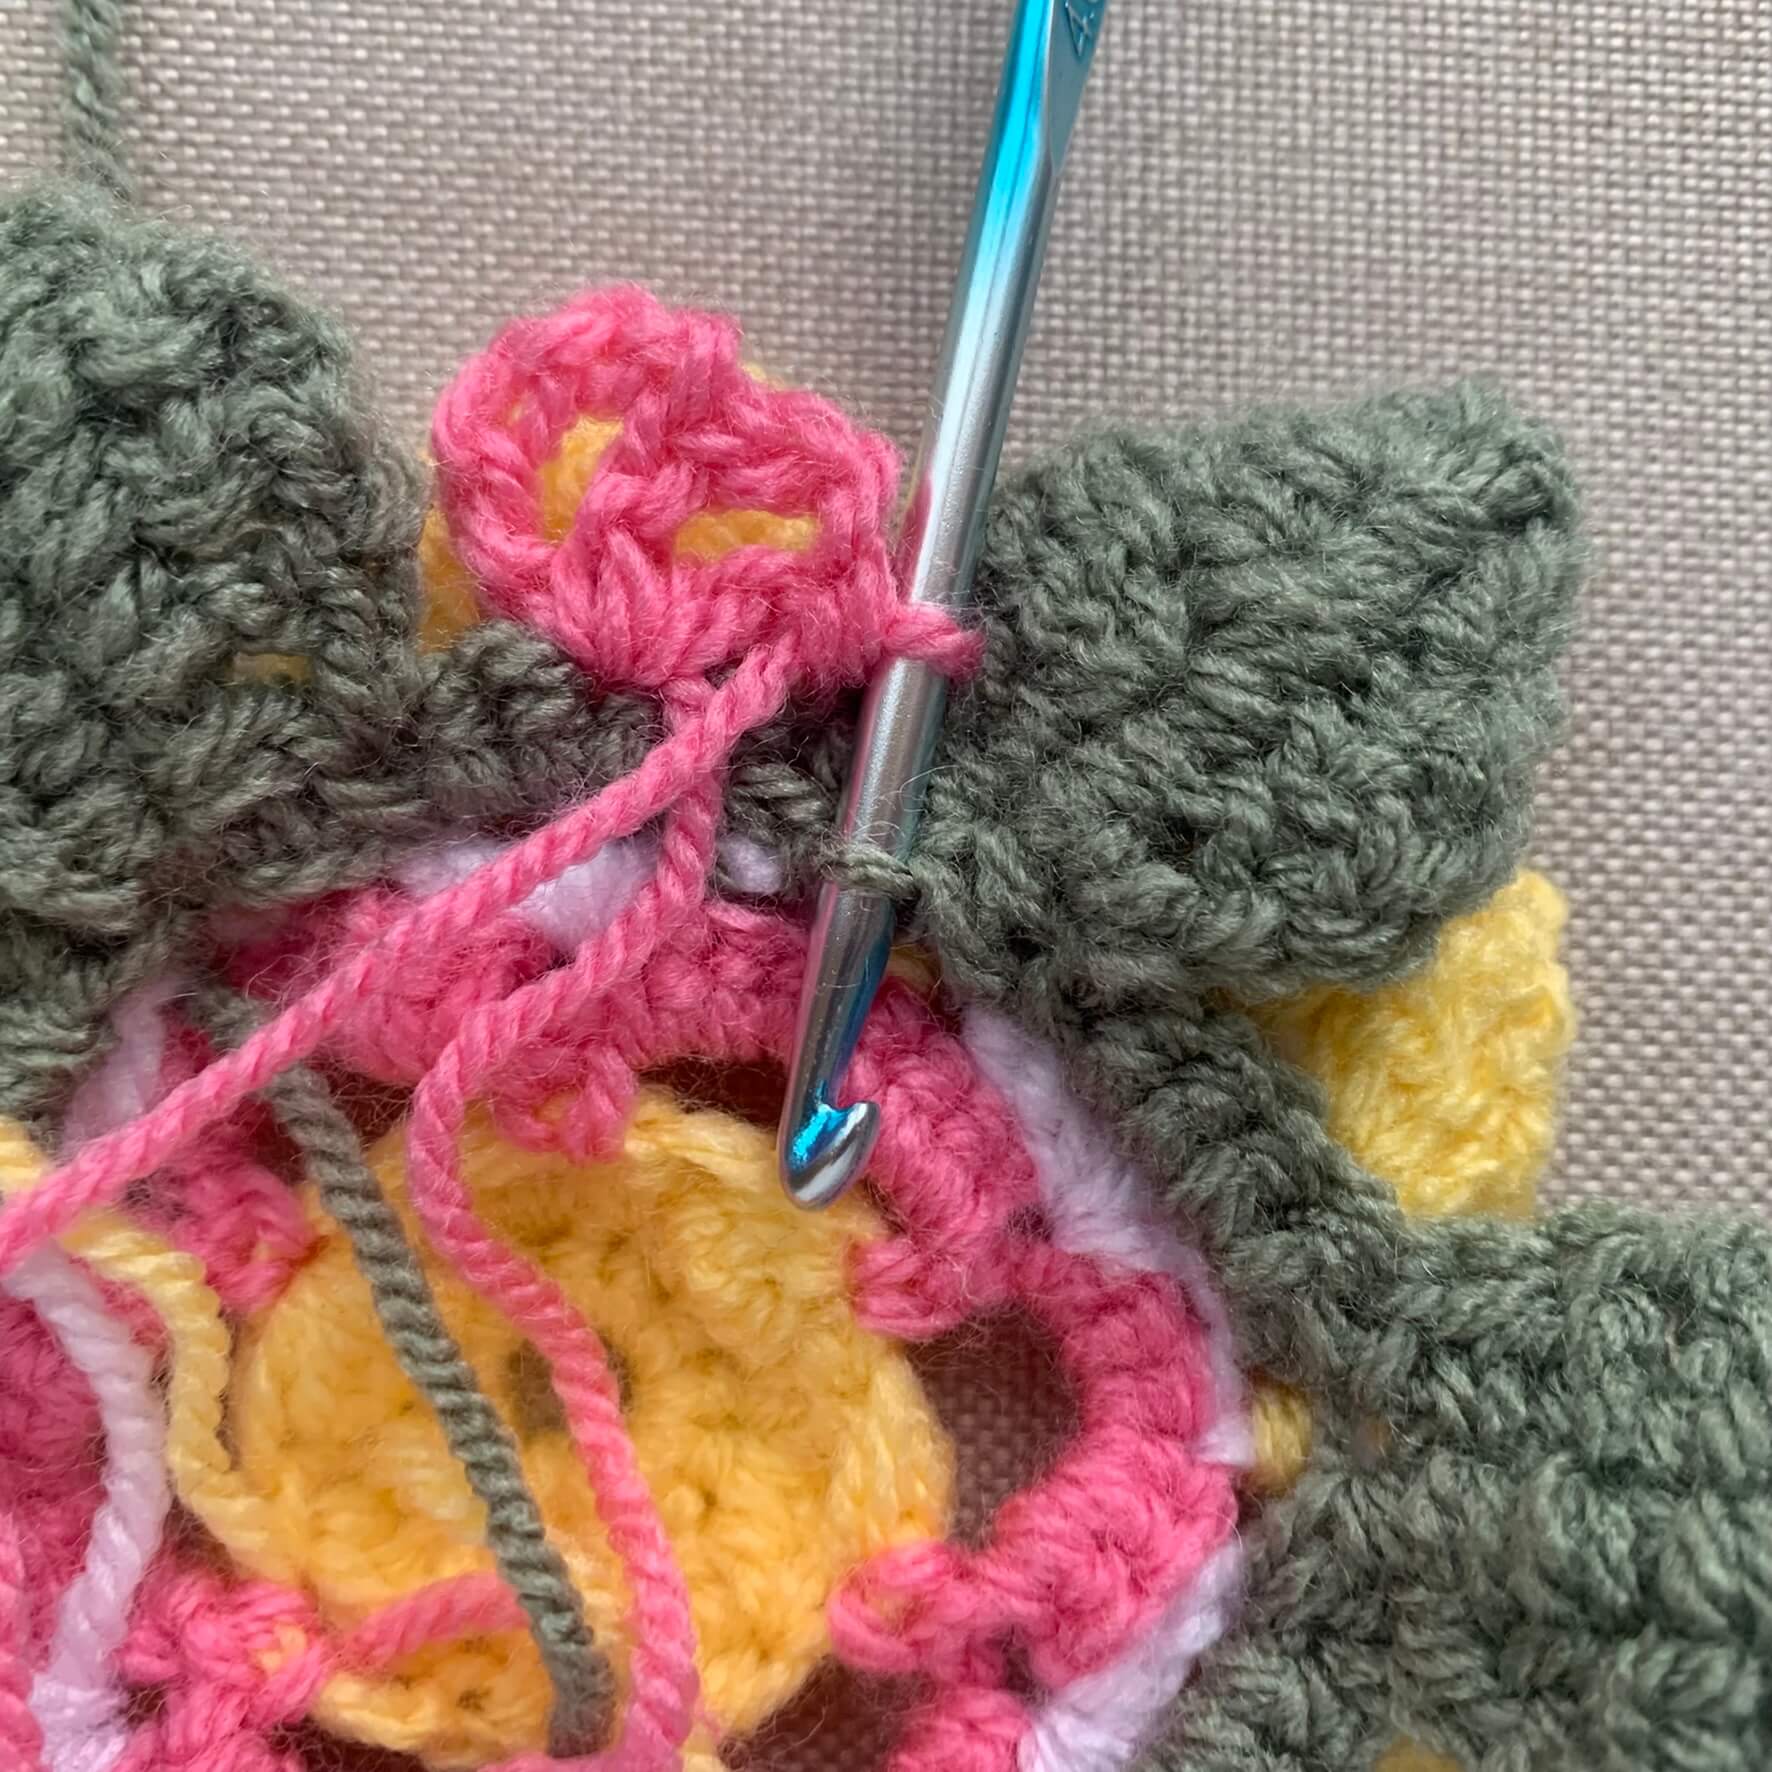
Round 10: Sl St into ch2 sp, Ch1, *[2HDc, 2Dc, 2Tr, DTr, Ch2, sl st to 1st ch], [DTr, 2Tr, 2Dc, 2HDC], ch1, FPHDc around Sc of previous round, ch1*, sl st to 1st HDc to join. Fasten off. (90 & 12 ch1 spaces)
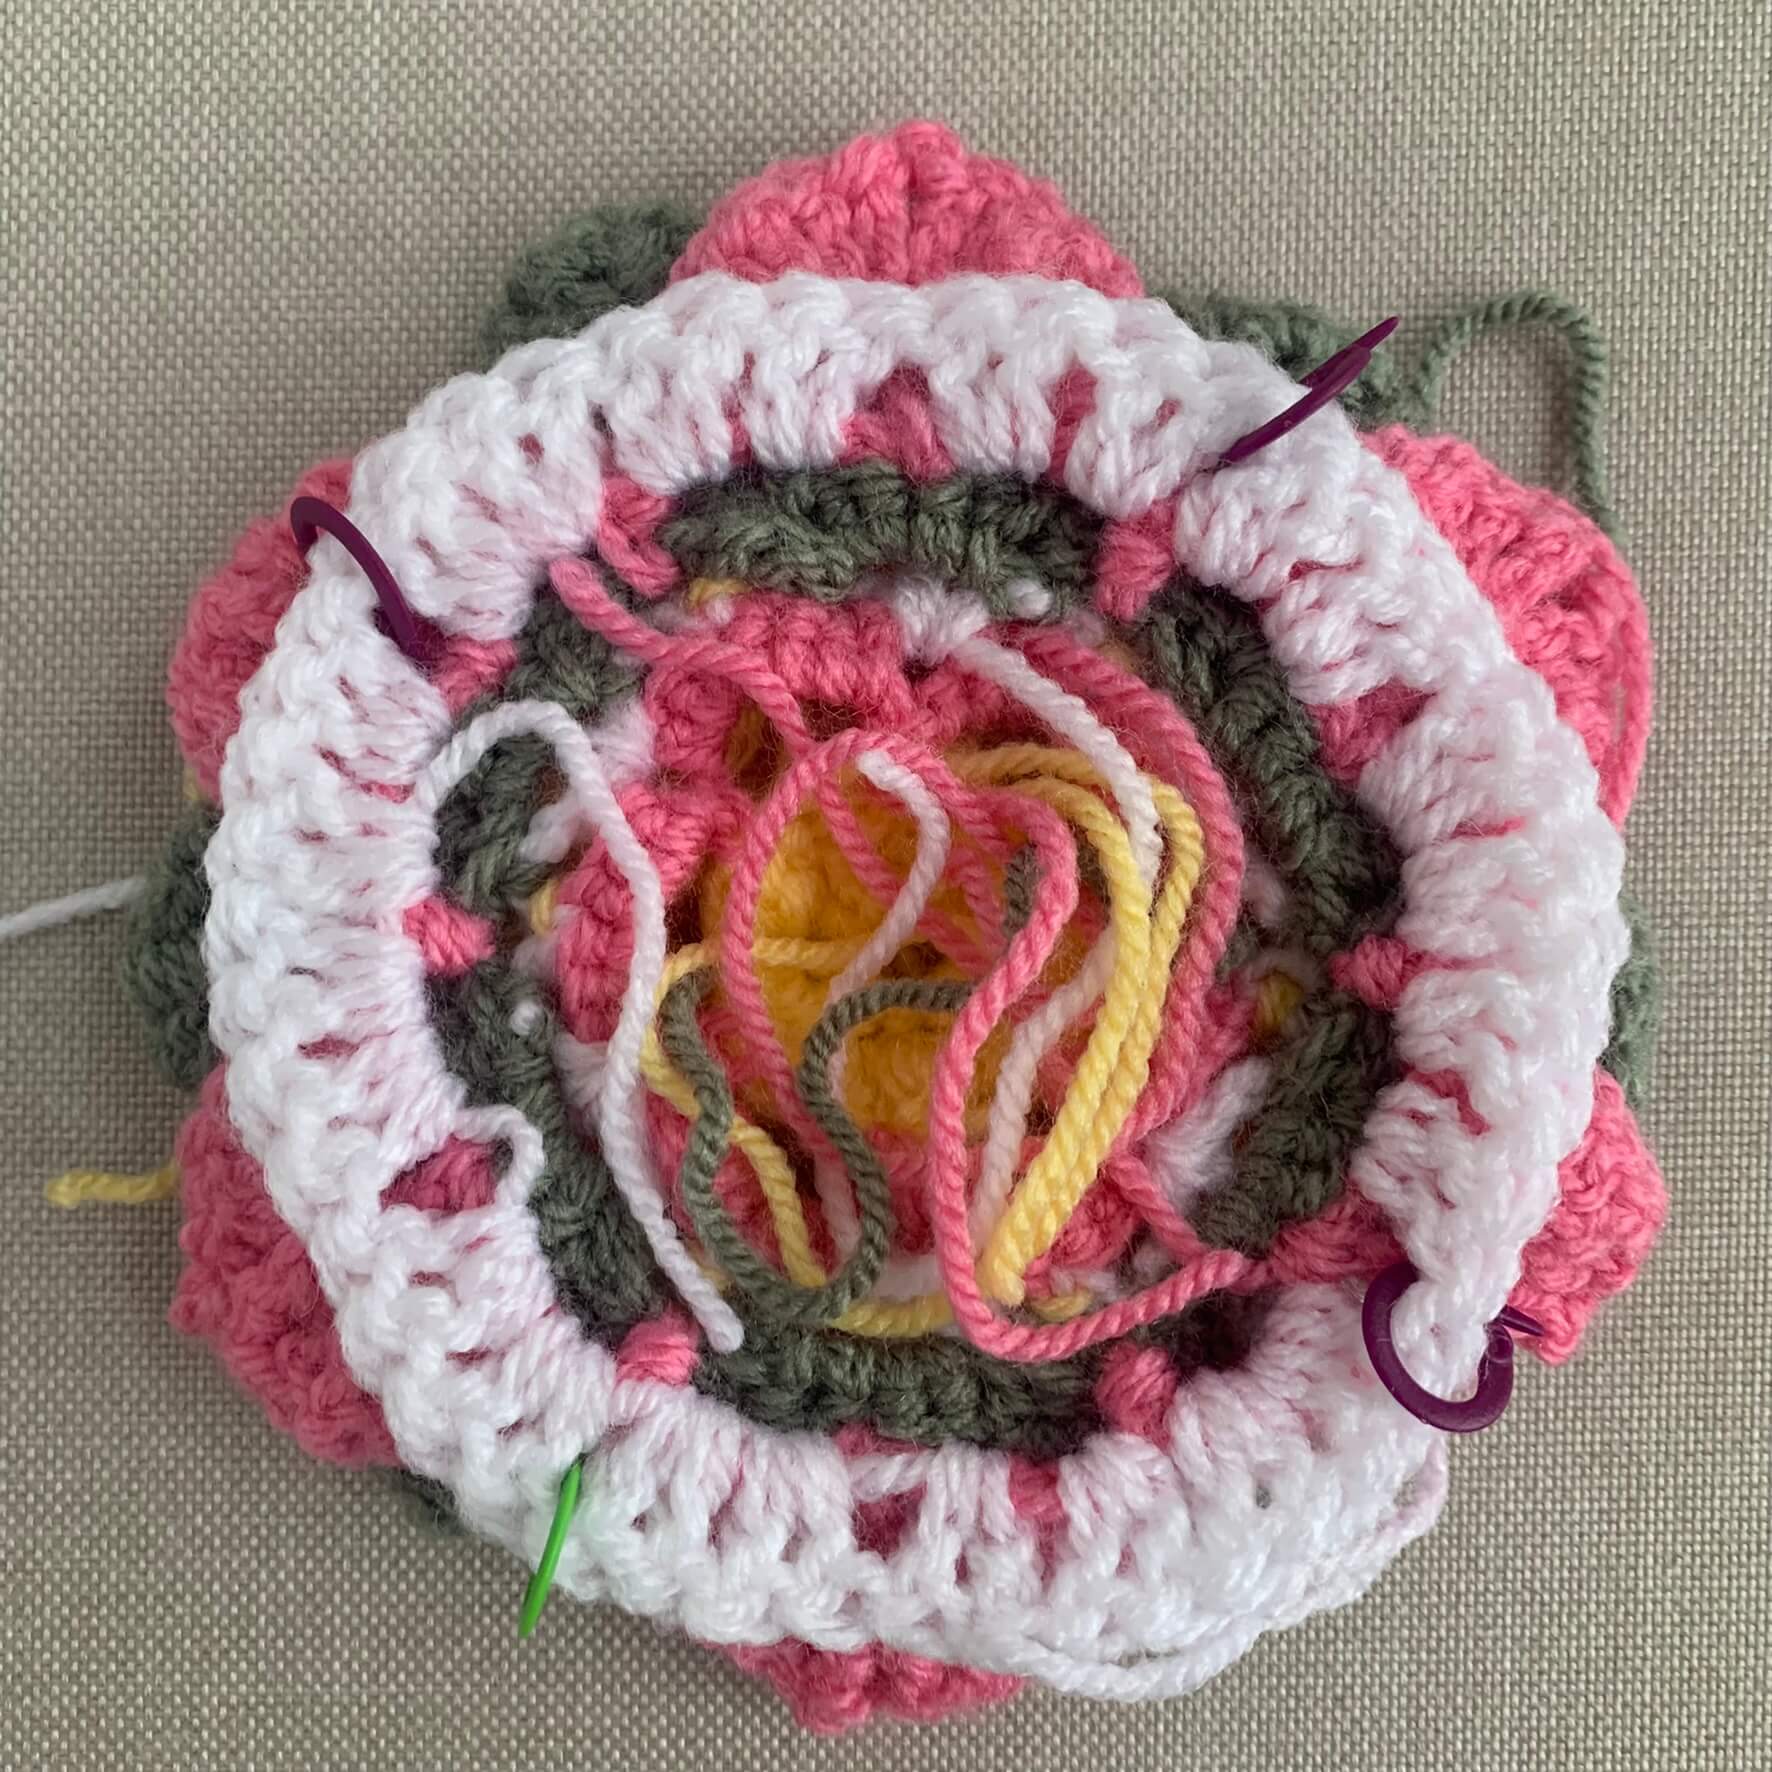
Round 11: Change to C: Join in any 2 ch sp from Round 9, ch3, Dc in same ch2 sp as ch3, 2Dc into each ch2 sp from Round 9 & ch1 sp from Round 10 around, sl st to top of ch3 to join. (48)
PM between 2Dc next to where round joined. PM between every 6th 2Dc to mark the corners – see image below
Crochet 3D Flower Granny Square Video Tutorial | Part 1
Springtime Blooming Granny Square | Part 2
Round 12: All stitches will be worked between 2Dc. Sl st into space marked, Ch3, [2Tr, Ch2, 3Tr] in same space as ch3, *3Dc, 3HDc, 3Sc, 3HDc, 3Dc, [Dc, 2Tr, Ch2, 2Tr, Dc] in marked space (corner pattern)*, repeat between * and * to end. The last repeat will not require the corner pattern to be worked. Sl st to 3rd ch join. (28 clusters)
Round 13: Sl st to corner space. Ch3, [2Dc, ch2, 3Dc] into corner, *3Dc across to corner, [3Dc, ch2, 3Dc] into corner*, repeat between * and * to end. The last repeat will not require the corner pattern to be worked. Sl St to 3rd ch to join. (32 clusters)
Rounds 14 & 15: Repeat Round 13. (36 (40) clusters)
Fasten off after Round 15 after sl st to corner.
Round 16: Change to A: Join in any corner sp. Ch3, [2Dc, ch2, 3Dc] into corner, [Dc, ch1, Dc] into each cluster space across to corner, [3Dc, ch2, 3Dc] into corner*, repeat between * and * to end. The last repeat will not require the corner pattern to be worked. Sl St to 3rd ch to join. Sl st to corner space. (72 Dc, 8Dc corner groups)
Round 17: Repeat Round 16. Fasten off after sl st to corner. (80 Dc, 8Dc corner groups)
Round 18: Change to D. Join in any corner space, Ch3, [2Dc, ch2, 3Dc] into corner, *[Dc, Spike 2 rows down, Dc], [Dc, Spike into Ch1 sp one row down, Dc]* Repeat between * and * to corner, **[3Dc, Ch2, 3Dc into corner], [Dc, Spike into Ch1 sp one row down, Dc], [Dc, Spike 2 rows down, Dc]**, repeat between ** and ** to corner, [3Dc, Ch2, 3Dc into corner]. Repeat from * to end of ** to complete round, The last repeat of ** will not require the corner pattern to be worked. Sl St to 3rd ch to join. Sl st to corner space.
Round 19: Ch1,*[3HDc, ch2, 3HDc] in corner sp, HDc into each st across to corner*, repeat between * and * to end. sl st to 1st HDc to join. Fasten off and weave in ends.
Lightly block to size and encourage petals and leaves to shape.
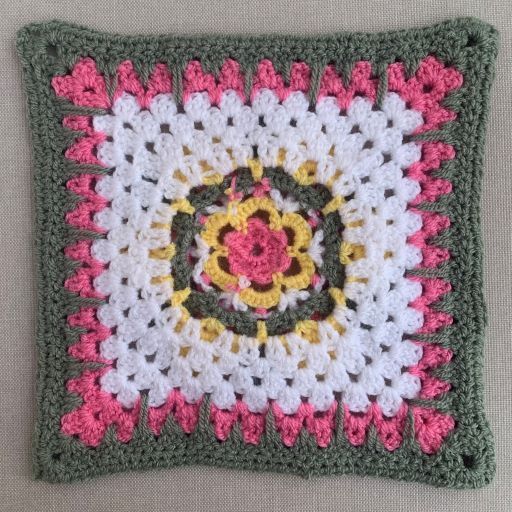
This square will require blocking to ensure that your flower looks fully bloomed and is the right size for inserting into blankets.
The easiest way to do block this square:
- Grab your tape measure and some pins
- Pin out to size (10″ by 10″) on your ironing board
- Pin down the petals and leaves into position
- Mist lightly with water
- Allow to air dry (or use your hairdryer on a cool setting to dry faster)

3D Flower Granny Square Video Tutorial | Part 2
Maker Inspiration
I am always so grateful to my pattern testers who test the written pattern to ensure accuracy and reduce errors in the written pattern.
Without them, who knows what your square would look like!
If you’ve loved making your very own Blooming Springtime Granny Square, share a picture with me in the community Facebook group so we can celebrate your successful project too!
